 Tapetowanie sufitu jak się za to wziąć ?
Tapetowanie sufitów nie jest czynnością tak trudną jak się wydaja Dzięki prawidłowo ustawionemu rusztowaniu i zastosowaniu odpowiedniej techniki, nie jest to praca bardziej skomplikowana niż tapetowanie ścian.
Powodzenie w tapetowaniu sufitów w zasadniczym stopniu zależy od przygotowania frontu robót i dobrej organizacji pracy. Wszystkie potrzebne materiały należy zgromadzić przed rozpoczęciem pracy.
Pierwszym krokiem jest ustalenie kierunku, w jakim tapety będą naklejane. Na tej podstawie wyliczymy, ile arkuszy można przyciąć z jednej rolki. Standardowa długość arkusza w rolce wynosi 35,5 m, a szerokość 53 cm. Grube tapety mają długość 17 m. Aby obliczyć potrzebną liczbę rolek tapety, mierzymy długość wszystkich ścian (bez uwzględniania występów, jak np. ściany kominowe). Dodajemy razem wszystkie zmierzone długości i posługując się zamieszczoną obok tabelą, obliczamy niezbędną ilość rolek.
Materiały
Wszystkie rodzaje tapet, które nadają się do wyklejania ścian, są również odpowiednie do tapetowania sufitów. Jeżeli zdecydowaliśmy się na papierowe tapety z wypukłą fakturą, powinniśmy wiedzieć, że należy pomalować je przynajmniej jedną warstwą farby emulsyjnej, ponieważ bardzo łatwo się brudzą. Tapety głęboko tłoczone malujemy dwukrotnie.Do różnych tapet używa się różnych klejów, informację na temat doboru najlepszego kleju do wybranej tapety I uzyskamy u sprzedawcy.
Przed rozpoczęciem tapetowania sufit powinien zostać zagruntowany, aby stał; się mniej porowaty. Zazwyczaj do tego celu używa się rozcieńczonego kleju do tapetowania. Specjalnego środka do gruntowania wymagają jedynie kleje zawierające dekstrynę.
Podkład papierowy
Naklejanie specjalnego podkładu z arkuszy papierowych nie jest konieczne, jednak dobrze przyklejony podkład w poprzek do właściwej warstwy tapety zapobiega uwidacznianiu się ewentualnych szpar pomiędzy arkuszami właściwej warstwy. Dotyczy to zwłaszcza tapet tłoczonych. Mają one tendencję do kurczenia ślę podczas wysychania kleju.
Dodatkową zaletą zastosowania podkładu jest fakt, że lepiej od tynku wchłania klej, dzięki czemu łatwiej jest tapetę przykleić.
Wyklejanie sufitu
Niezależnie od tego, czy zastosujemy papierowy podkład, czy nie, sufit musimy starannie oczyścić z łuszczących się resztek farby, aby był idealnie czysty. Warstwy starej błyszczącej farby trzeba
przeszlifować papierem ściernym, a ewentualne pęknięcia wypełnię,szpachlówką do tynków. Wszelkie stare tapety powinny być całkowicie zerwane, aby powierzchnia sufitu była możliwie gładka.
Gdzie zacząć
Staramy się kierować ogólną zasada, która mówi, że tapety należy przyklejać źródła światła. Zapobiega to powstawaniu cienia na połączeniach arkuszy. Jeśli okna znajdują się na obu przeciwległych ścianach, miejsce rozpoczęcia tapetowania nie jest istotne. W wypadku okna w wykuszu, pierwszy arkusz wyklejamy w poprzek wykusza, w miejscu zetknięcia się sufitem. Kolejne arkusze wyklejamy w kierunku okna.
Przed rozpoczęciem pracy wszystkie materiały i narzędzia trzeba rozłożyć tak, aby znajdowały się w zasięgu ręki. Bardzo ważne jest przygotowanie odpowiedniego rusztowania.
Rusztowanie
Wszelkie prowizoryczne rusztowania są niebezpieczne. Najlepiej jest użyć dwóch rozstawionych drabin i szerokiej mocnej deski. Aby nie trzeba było ciągle wchodzić i schodzić z rusztowania, deska powinna być możliwie długa.
Podczas pracy zawsze należy mieć uwadze bezpieczeństwo, a pośpiech być powodem wypadków. Wysokość rusztowania należy dostosować do pracy tak, aby w jej trakcie nie trzeba było schylać się lub zbyt wysoko sięgać. Gdy stojąc na desce, całą dłonią dotykamy do sufitu, oznacza to, że wysokość rusztowania jest odpowiednia.
Wyznaczanie linii wzorcowej
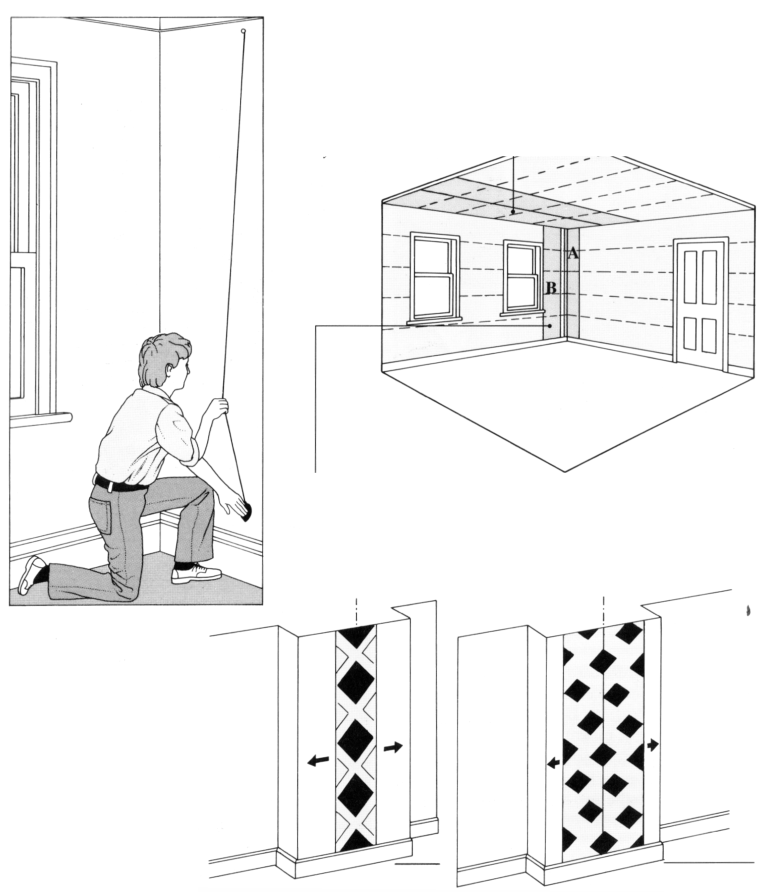
Rusztowanie ustawiamy wzdłuż narysowanej kredą linii wzorcowej, która wyznacza krawędź zewnętrzną bok pierwszego arkusza tapety. Położenie tej linii ustalamy odejmując 1 cm od szerokości arkusza. Ten odjęty centymetr jest zapasem na pokrycie ewentualnych nierówności na styku ściany i sufitu. Wyliczony wymiar odmierzamy od ściany i zaznaczamy na suficie w miejscach, gdzie znajdzie się początek i koniec arkusza..
Następnie w jednym z wyznaczonych punktów wbijamy pinezkę z przywiązanym końcem sznurka. Sznurek nacieramy starannie kolorową kredą, naciągamy i zaczepiamy w podobny sposób w drugim wyznaczonym punkcie. W połowie długości odciągamy go i energicznie puszczamy, aby kreda odbiła się na suficie. Otrzymana linia jest linią wzorcową, wzdłuż której przyklejamy pierwszy arkusz tapety wraz z zapasem przy ścianie.
Aby nie przerywać sobie co chwila pracy, wygodnie jest przygotować kilka przyciętych arkuszy. Pierwszy arkusz należy staranne zmierzyć, dodając 10 cm zapas. Kolejne arkusze możemy odmierzać według pierwszego. Przycięte arkusze układamy na dużej płycie lub stole zakrytym folią i gazetami, prawą stroną do dołu.
Nanoszenie kleju
Arkusz tapety rozkładamy na stole w taki sposób, aby jeden jego koniec wystawał poza stół na długość około 1 cm. Takie ułożenie zapobiegnie pobrudzeniu stołu arkuszy klejem.
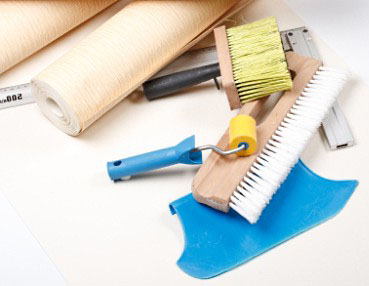
Dużym, dobrze namoczonym pędzlem nakładamy klej na środek arkusza. Im większy pędzel, tym szybciej klej zostanie rozprowadzony, co zapobiegnie jego wysychaniu zanim przykleimy tapetę do podłoża. Zaczynając od wystającego zakładu, rozprowadzamy klej skośnymi ruchami od środka arkusza na zewnątrz. Aby nie przeoczyć jakiegoś miejsca, dobrze jest nanosić klej ruchami na krzyż. Stopniowo podsuwamy arkusz aż dojdziemy do początku, pozostawiając wysunięty fragment szerokości 1 cm.
Składanie arkusza
Gdy cała powierzchnia arkusza będzie równo posmarowana klejem, możemy przygotować go do przyklejenia na suficie. W tym celu unosimy koniec arkusza o długości 30 cm i składamy ze sobą stronami posmarowanymi klejem. Następnie chwytamy sklejony zakład i ponownie składamy ze sobą kolejne 30 cm posmarowanego arkusza. Postępujemy tak, aż cały arkusz złożymy w harmonijkę. Pozwoli to na rozwijanie takiego odcinka tapety, jaki możemy jednorazowo przykleić do sufitu.
Zanim wejdziemy z tapetą na rusztowanie, upewnijmy się, że mamy w kieszeni kombinezonu lub fartucha szczotkę do wygładzania tapet oraz ostre nożyce.
Przyklejanie arkusza
Tapetę złożoną w harmonijkę układamy na drążku lub tekturowej rurce. Pozwoli nam to utrzymywać tapetę blisko i równolegle do sufitu, jeżeli jesteśmy praworęczni, chwytamy drążek prawą ręką, a kciukiem przytrzymujemy harmonijkę, pozostawiając luzem pierwszy zakład.
Zakład rozwijamy i przyklejamy do sufitu wzdłuż narysowanej kredą linii. Przyklejony odcinek arkusza wygładzamy, pociągając szczotką od środka arkusza w kierunku krawędzi. Usuwamy tym samym spod tapety pęcherzyki powietrza.
Gdy się upewnimy, że pierwszy zakład został przyklejony równo wzdłuż linii, rozwijamy kolejny i wygładzamy w taki sam sposób. Wszelkie poprawki położenia tapety należy korygować całą dłonią, a nie palcami, gdyż może to spowodować rozerwanie mokrego papieru.
Po przyklejeniu kilku zakładów, ustawiamy się tak, aby rolkę wraz z tapetą mieć przed sobą. Następnie przesuwamy się powoli do przodu, rozwijając kolejne zakłady i przyklejamy je do sufitu.
Postępujemy w ten sposób aż przykleimy cały arkusz. Teraz możemy poodcinać zapasy pozostawione na końcach arkusza. Jeżeli ściana także będzie tapetowana, pozostawiamy na niej zapas 5-10 mm. Jeśli tapeta będzie się łączyć z już istniejącą na ścianie, trzeba ją zagiąć wzdłuż linii styku i odciąć.
Kolejne arkusze tapety przyklejamy w opisany wcześniej sposób, traktując bok poprzedniego, arkusza jako linię zwrócić uwagę, aby arkusze nie zachodziły na siebie, lecz były jedynie ciasno do siebie dociśnięte.
Aby klejenie było wykonane starannie, a krawędzie arkuszy dobrze doklejone, trzeba użyć rolki do spoin. Kiedy klej podeschnie (tj. mniej więcej po ułożeniu czterech arkuszy), dociskamy rolką łączące się krawędzie tapety.
Tapet tłoczonych oraz tapet z wypukłym wzorkiem nie należy dociskać rolką, aby nie zniszczyć oryginalnej faktury. W tym wypadku połączenia arkuszy dociskamy ostrą krawędzią rolki.
